

we know what that means..
..its time for my tutorial for English paper piecing
of the rose star block.
yay!
May I suggest that you read through a couple of times
so you really get to grips with it.
Have fun!
yay!
May I suggest that you read through a couple of times
so you really get to grips with it.
Have fun!

When I was looking for a design for Marys mini quilt
I found Eileen and her beautiful quilt on her blog at
my quilting porch
Her blocks are quite a bit bigger than mine.
 Eileens quilt
After much head scratching and puzzlement
Her blocks are quite a bit bigger than mine.

I realised the pattern is actually a lot easier than it looks.
As you can see from my sketch it's basically dissected hexagons.

I used one that measured 3 inches across
from point to point.
from point to point.
I found a hexagon shape from google images
and printed it.
Edit
Kreatives von mir has just shared her template (on flickr)
drawn up on squared paper.
It's a really helpful idea..
wish I was that clever!
Measure halfway along on the sides shown aboveand printed it.
Edit
Kreatives von mir has just shared her template (on flickr)
drawn up on squared paper.
It's a really helpful idea..
wish I was that clever!

and draw a line across to make the disected shapes.
note:
You can either make 3 cardboard templates to draw around
or you can just draw and measure as I have done.
or you can just draw and measure as I have done.

For one block you will need
1 hexagon
12 petal shapes
18 kite shapes
Cut out your fabrics roughly an extra 1/4 inch larger than your papers,
and tack them with large stitches holding the corners down as you go.
Before you begin to sew them together,
make sure you like your composition.
Don't be afraid to try different fabrics,
I quite often find clashing fabrics can work really well.
and tack them with large stitches holding the corners down as you go.
Before you begin to sew them together,
make sure you like your composition.
Don't be afraid to try different fabrics,
I quite often find clashing fabrics can work really well.

I am using a mixture of vintage and new fabrics.
I've chosen to keep the centres solid as I'm going to hand quilt them.
With all your fabrics tacked to their templates
it's now just a case of sewing the correct pieces back together.
I don't think it matters what order you do it in,
as long as you end up with hexagon to hexagon.
Just check back with my original drawing if you get lost.
Just check back with my original drawing if you get lost.

Hold the pieces together and whip stich over the edges
until you run out of thread.
Here I'm using a pale grey thread to blend better,
though on paler fabrics I've used white.

Here you can see my progress and see the hexagons reforming.

The finished back complete with papers,
which can be removed from the inside and used again.
Always keep the outer edge papers in place until you have sewn into your desired project.

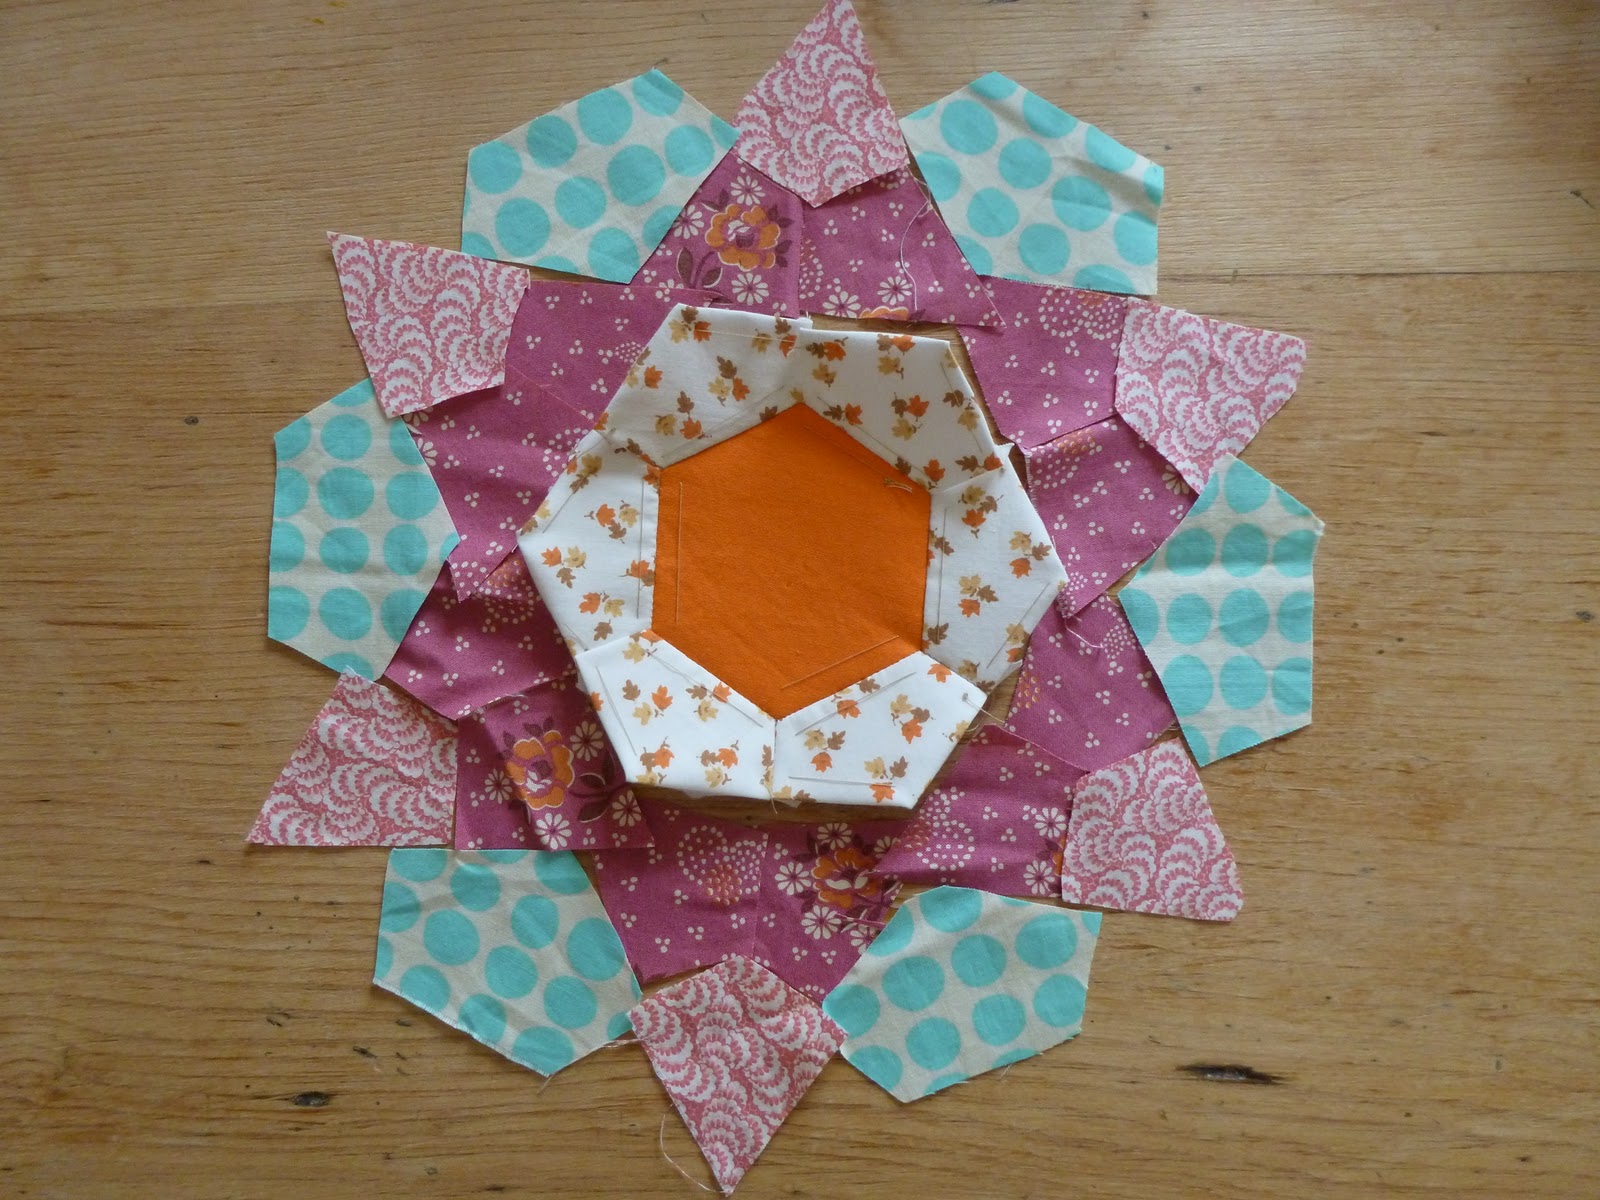
So here it is
the rose star.
Once you understand how the jigsaw fits together
you can join blocks with a solid colour
still using the same templates.


Once you understand how the jigsaw fits together
you can join blocks with a solid colour
still using the same templates.

The fun thing about this pattern is choosing the colours and fabrics.
If you would like to have a go or see more.
I like to use mixes that you might shy away from.
I do try and link the overall quilt together.
The dominant colour was turquoise,
which featured on every block.
The finished size of the quilt is approx 20x30''If you would like to have a go or see more.
why not join my block party on flickr
Click on the picture to take you there!
edit: I have recently discovered that this pattern may also be called
the kite pattern, as it is possible to make with just one template..the kite.
However, me being one for an easy and faster method,
I simplified the design by using one whole hexagon in the middle.
(for fussy cutting you could use the kite method instead)
Apparently the kite pattern is in the book Material Obsession two,
I don't own any material obsession books,
maybe I should!
If you love this pattern but can't sew by hand I think there is possibly
a machine technique out there somewhere.
I prefer paper piecing for it's accuracy
and take anywhere approach!
second edit:
There are some great hints and tips being posted in the flickr group,
do take a look!
Inspiration.

The colour palette for this project was inspired by my
hand pieced quilt which I named.
32 comments:
You make it sound so simple - need to get that template cut out!
And both quilts are still two of my favourites!
I think this is the same pattern as in Material Obsession Two. Although they use just the one template, each template has 72 pieces!!!
Great tutorial Clare. I think the design looks like a kaleidescope, especially with all the different patterns and colours being used!
Fantastic job, Clare!!! I can't wait to get cuttin' and stitchin'!!! Thanks for putting this together :)
I really like this pattern. I have made a hexagon quilt with english paper piecing but all the same size. This might just get me to make another but not till I finish my ufo's
this is a great tutorial! i can't participate in the block party, but will bookmark this for later use! :)
This is an awesome block... Really beautiful! And you do make it sound so simple...
That looks fantastic, but so complicated! I'm not sure my skills (and patience) are up to that yet, but I'm so impressed. Gorgeous quilts. XX
Thanks for sharing the pattern, can not wait to start. Not for some geometry!
Looks great Clare! I can't wait to get started. Gonna be fun!
Gosh that all looks far too complicated!! Rather you than me!!
Love Helen xx
wow! You make it look amazingly do-able! Even for me, what a fab tute!
Youve just given me the perfect pattern for the inside surface of one of my bowls. I'm fed up trying to make a square quilt block fit a round bowl - now I won't have to! Thanks!
thanks for sharing the tutorial. I made my template (you've seen it here) and will copy it to have enough pieces. I hope to start this project soon.
Clare, Thank you so much for a clear tutorial & a wonderfully cheerful quilt along. I had a really crappy weekend and this is just the pick-me-up I needed.
jess
Thank you for generously sharing these beautiful blocks. Your pictures and instructions are very clear and inviting...
; )
Beautiful block!!!!!! Thanks!!!
OH my. I am terrified. Can't even in my wildest imagination see myself accomplish something so... so... gorgeous but hard core super-difficult!One day I will give this a go... Not today. I have to let this settle a bit. I amazed by your work and think you are fantastic!Wow!
I can't wait to start! But I have a true novice question: how do you measure the 3"? Is 3" the length of one side, or the measurement from one flat side to another? Thanks!
ashtonishing!! Great job!! :))
thanks for sharing it with us.
Love the way you do this !! I have "The Material Obsession Two" book, but your method is much better!
It's been a while that I did epp (25 years ago at school !!), so I'm going to try one rose star at first.
Who knows, maybe I'll get so addicted, that it will become a whole quilt afterall !!
That's really cool! I need to give that a go :-D
This is a site where you can make your own graph paper with lots of shapes - easy way to print lots of hexies.
http://incompetech.com/graphpaper/trianglehex.html
Thanks for the tutorial!!
I like this star. Is their a reason you have to hand sew it? As a guy I did not grow up quilting but love this pattern. would sewing it together with a machine work?
http//richardquilts.blogspot.com
Fabulous tutorial, Clare. I have the Material Obsession books and Sarah Fielke's new one also. They are great books and well worth a look.
HI Clare- I have drawn and cut out my first rose star which I have found so inspirng on your blog and tutorial . I am about to put it togeher tonight! Eileens quilt is stunning.
Heather x
Clare,
I'm your newest follower. I am absolutely in love with the rose star and loved your tutorial. Thank you so much for sharing. It's so nice to meet you!
Julie
Beautiful quilt Clare. Did you applique the finished rose stars onto a plain white base fabric, or did you hand stitch white paper pieced segments to the stars to make the completed patchwork quilt? If it was the latter, would you please explain how you did it? Thanks, you are such an inspiration :)
Beautiful. I love seeing a quilt that takes time. Sometimes I think quilt making has become a speed sport!
Very nice. I'm going to try it! I love EPP!
Thank you for this tutorial! I've just ordered a Marti Michell template set for this block, and now I know how to do it when it comes. Again, Thanks for sharing! Love your quilt.
Magnifico Tutorial gracias por publicarlo
Post a Comment